Dell™ XPS™ M1210 Service Manual

|
CAUTION: Before you begin any of the procedures in this section, follow the safety instructions in the Product Information Guide. |
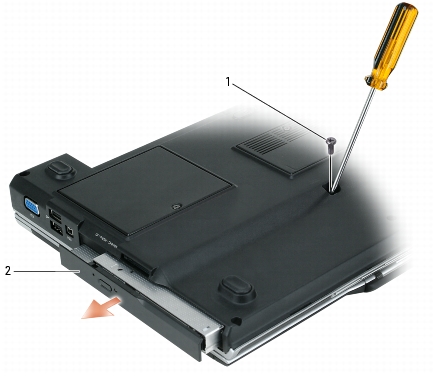
Your computer ships with a fixed optical drive installed.

|
NOTICE: To help prevent damage to drives, store them in a safe, dry place when they are not installed in the computer. Avoid pressing down on them or placing heavy objects on top of them. |

|
1 |
M2.5 x 8-mm optical-drive locking screw |
2 |
optical drive |