 WLAN Card
Dell™ XPS™ M1210 Service Manual
 Subscriber Identity Module (SIM) Card

|
CAUTION: Before you begin the following procedure, follow the safety instructions in the Product Information Guide. |

|
CAUTION: Only products approved for use in your portable computer may be installed. |

|
NOTICE: To avoid electrostatic discharge, ground yourself by using a wrist grounding strap or by periodically touching an unpainted metal surface (such as the back panel) on the computer. |

|
NOTICE: To prevent damage to the system board, remove the main battery (see Before Working Inside Your Computer) before working inside the computer. |
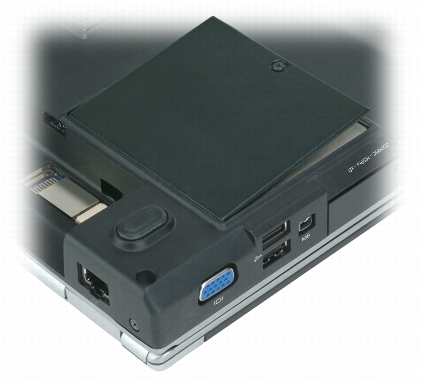
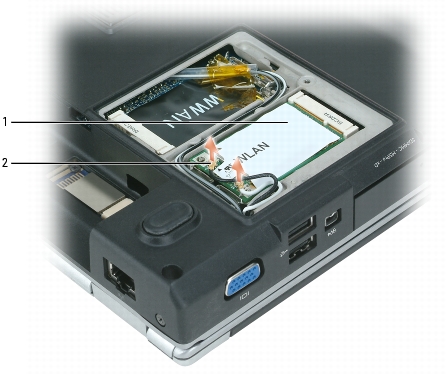
|
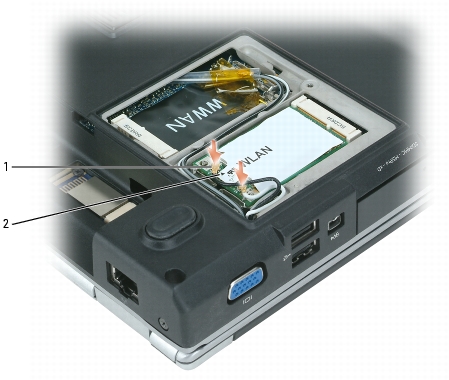
1 |
WLAN card |
2 |
antenna cable connectors (2) |
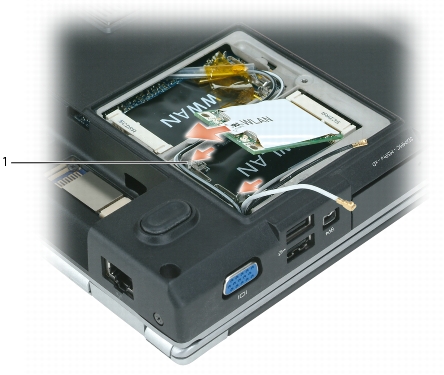
|
1 |
metal securing tabs (2) |

|
NOTICE: The connectors are keyed to ensure correct insertion. If you feel resistance, check the connectors and realign the card. |

|
NOTICE: Do not install a Mobile Broadband card in the WLAN card slot. |
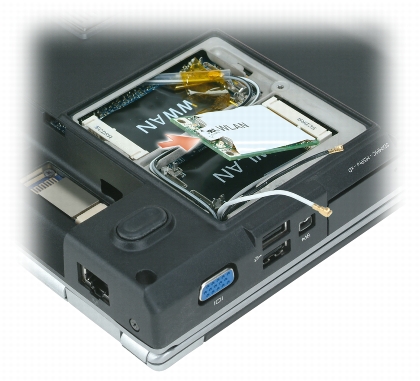

|
NOTICE: To avoid damage to the WLAN card, never place cables under the card. |

|
NOTE: If you are installing a WLAN card for the first time, you will find a clear-plastic protective sleeve on each antenna cable connector. Before you connect the antenna cables to the WLAN card, slide the sleeves off of the cable connectors. |

|
NOTE: Your WLAN card may have two or three antenna connectors, depending on the type of card you ordered. If your computer has a gray antenna cable, attach it to the connector with the gray triangle, if one is available on your card. |
|
1 |
antenna cable connectors (2) |
2 |
triangles (2) |

|
CAUTION: Before you begin the following procedure, follow the safety instructions in the Product Information Guide. |

|
CAUTION: Only products approved for use in your portable computer may be installed. |

|
NOTICE: To avoid electrostatic discharge, ground yourself by using a wrist grounding strap or by periodically touching an unpainted metal surface (such as the back panel) on the computer. |

|
NOTICE: To prevent damage to the system board, remove the main battery (see Before Working Inside Your Computer) before working inside the computer. |

|
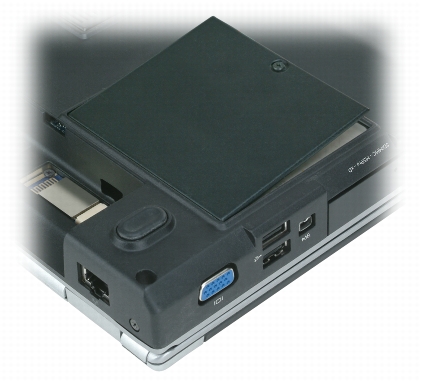
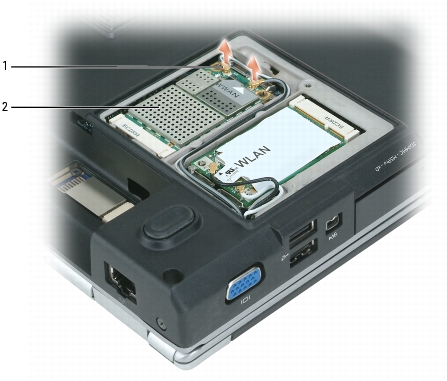
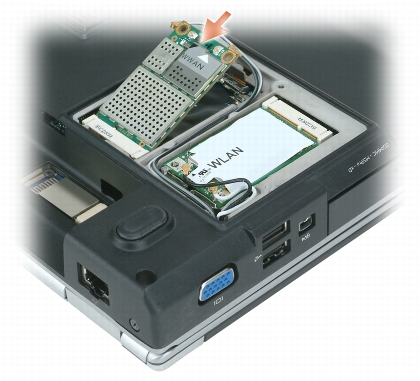
NOTE: Mobile Broadband cards are also known as WWAN cards. |
|
1 |
Mobile Broadband card |
2 |
antenna cable connectors (2) |
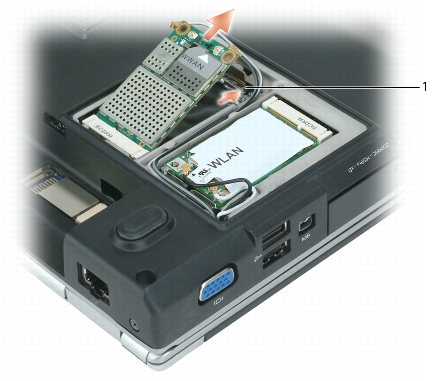
|
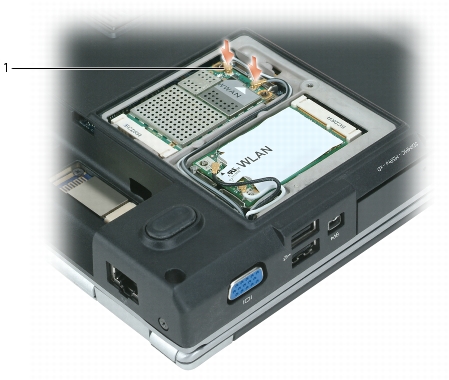
1 |
metal securing tabs (2) |

|
NOTICE: The connectors are keyed to ensure correct insertion. If you feel resistance, check the connectors on the card and on the system board, and realign the card. |

|
NOTICE: Do not install a WLAN card in the Mobile Broadband card slot. |

|
NOTICE: To avoid damage to the Mobile Broadband card, never place cables under the card. |
|
1 |
antenna cable connectors (2) |

|
CAUTION: Before you begin the following procedure, follow the safety instructions in the Product Information Guide. |

|
CAUTION: Only products approved for use in your portable computer may be installed. |

|
NOTICE: To avoid electrostatic discharge, ground yourself by using a wrist grounding strap or by periodically touching an unpainted metal surface (such as the back panel) on the computer. |

|
NOTICE: To prevent damage to the system board, remove the main battery (see Before Working Inside Your Computer) before working inside the computer. |

|
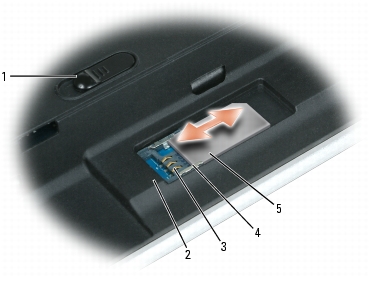
NOTE: The SIM card is located in the battery bay. You must remove the main battery (as instructed in Before Working Inside Your Computer) before you can access the SIM card. |
.
|
1 |
battery-bay latch release |
2 |
battery bay |
3 |
SIM card connector |
|
4 |
metal tabs (2) |
5 |
SIM card |
|
|

|
NOTICE: To protect the SIM card from electrostatic discharge (ESD), do not touch the SIM card connector. Also, take care when removing the card to slide the card completely out of the metal tabs before lifting the card out of the slot. The card is brittle and may easily break otherwise. |